236s
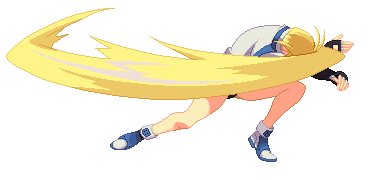
S version of Tandem Top, this move is mainly used in combos, as it is not safe to throw out randomly due to it being 11 frames of startup and her being in CH state for the entire animation. Primarily used in corner combos, she can hitconfirm into it from 6k overhead, 2s, 5s, 5h, and even 2d in some rare cases. After Tandem Top wallbounce, there’s a variety of things she can link after it, which will be explained in more detail in the combos section. It’s also safe to do this move as a blockstring ender as it is just -1 on block. It also has an FRC point on Frame 3-4, which is before the hit frame. Some people think of it as an invaluable addition to her pressure, as it’s basically a roman cancel from anything for 25% meter, while others like me think it’s a nice addition but not too important as she has better ways to spend her meter.
236h

H version of Tandem Top, this move along with FB Pretty Maze and Secret Garden are the meat and bones of her mixup game. H Tandem Top has more universal application since it requires no meter and is good both in the corner and midscreen. It has massive startup at 60f, and 33 active frames. The delay of this move combined with its long active frames make it perfect to set up after a knockdown to cover her mixups and add more damage potential to them.
The disc however, disappears if she gets hit both during and after the disc materializes. A more in-depth explanation of the way this move is used is provided in the okizeme section. H Tandem Top can also be good in neutral, as it stays out for a long time so it controls that area of the screen for the time it is out. However, make sure you can get the disc out safely if you choose to use it in neutral, as the recovery is quite long.
In blockstrings, it is usually safe to throw this out at the end of them if you’re far enough away from the opponent. Again, don’t be predictable though, as some characters can really punish you for doing this repeatedly if they IB the last normal. The FRC point on it in Accent Core got changed to Frame 20-21, later than what it was in previous versions. This combined with the addition of FB Pretty Maze make 236h FRC kind of obsolete. However, in certain matchups 236h FRC sees more application, like against Robo-Ky and Baiken.
236d

Forcebreak Pretty Maze, this move is amazing. For 25% meter Millia creates a Tandem Top that is superior to H Tandem Top in every way. It has 43f of startup(as in, 43 frames before the disc actually starts hitting), but the disc actually begins to materialize at Frame 4. In addition, the move hits 3 times, is active for 41 frames, and has a vacuum effect. Also, after frame 4, the disc doesn’t disappear if she gets hit.
This move is used pretty similarly to H Tandem Top, except that it’s safer since it will protect her against most wakeup moves, since the disc doesn’t disappear if she gets hit. She gets more shots at a mixup because of it having longer active frames.
How you decide to use the 25% meter for H disc FRC or FB Pretty Maze is pretty much up to you. I generally always go for Pretty Maze after a knockdown if 25% meter is available, but some people believe it’s better to Pretty Maze on midscreen knockdowns, and H Tandem on corner knockdowns, since H Tandem midscreen mixups allow the opponent to reversal backdash.
This move is also good for throwing out sometimes during the opponent’s pressure sequences. If your opponent’s pressure is getting predictable and there are noticeable gaps in it, you can try IBing the normal before the gap and throwing this move out. Just as long as she gets after frame 4, the disc will come out no matter what. Even the best players sometimes will not be able to react and stop their pressure in time to block or get away from the disc.
j.236d
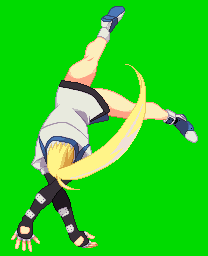
The air version of Forcebreak Pretty Maze, this isn’t quite as useful as the ground version or H Tandem Top, but it still has some uses. First off, this move can be used in combos, as it has huge untechable time on hit. Generally in corner air combos, if you notice that you are not at the height where Millia can get a knockdown, then it’s a good idea for you to combo into air FB Pretty Maze. Afterwards, Millia can then get a knockdown in a variety of ways.
In pressure, doing a tigerknee j.236d in a string is frame advantage on block. She also has some really nasty crossup setups with this, as whenever she is close and airdashing at the opponent, throwing the air FB disc will make her cross up as the disc materializes and the opponent will have to block the other way. However, it’s pretty difficult to consistently combo off of this, as there are a lot of variables involved like distance from the corner and whether or not it was a counterhit. This move is also great for controlling space and baiting counterhits, as the disc is guaranteed to come out after frame 6, and it’s active for a really long time at 33 frames.
214p
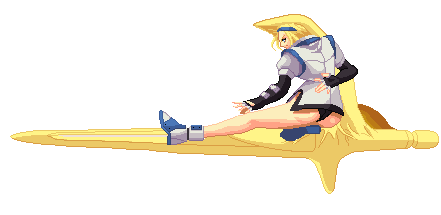
Iron Savior, this move has a number of uses. First off, it hits low and it makes Millia go into an unthrowable state(since she’s considered airborne), so you can run up to people and do this as they wake up to bait wakeup throws. It’s also okay to use this as a blockstring ender sometimes, though I don’t recommend using it often because it can be unsafe. This move is also acceptable to use in high/low mixup by itself: it’s a low hit but Millia hops in the air in the animation, so it can fool people who are looking for the TK Badmoon jump startup. Finally, Iron Savior has an FRC point on frame 17-22, which can be used to give her a very strong and pretty much unreactable mixup. More details on that in the okizeme section.
214k
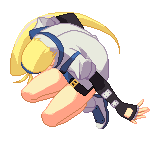
The roll, this move is really fun and has a lot of uses. First off, in mixups involving the H Tandem Top or FB Pretty Maze, she can do a crossup mixup by doing a roll if somewhat close to the opponent. This is normally pretty easy to react to, but it can be difficult if the opponent is solely looking for high/low. Also, in pressure she can do a blockstring into roll and then throw the opponent. This is also normally easy to react to by the opponent but it is difficult if they’re trying to mentally prepare for blocking her high/low mixup. You can also bait Dead Angle Attacks with this by doing a blockstring into roll, as the low profile Millia assumes makes her go under a lot of DAAs. Off the top of my head, she can’t roll under Testament and Jam’s dead angles since those hit very low to the ground.
And finally, in neutral situations this move is great for baiting and punishing pokes, as her low stance in this move allows her to roll under a large numbers of pokes in this game. I don’t have a list available of what pokes she can’t roll under, but that should be gained with experience. Obviously don’t try to roll against pokes that have very low-hitting hitboxes, like Sol 2d.
214s
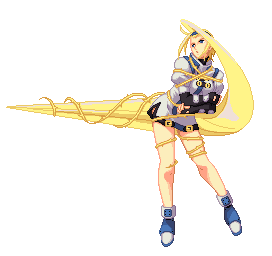
Bondage Millia is hot. This is Lust Shaker, and scrubs love using this move since it’s mashable and does decent damage if nobody knows combos. This move is mainly bad because Millia is all about outmaneuvering the opponent with her superior speed and movement options. This move makes Millia stay still and she can’t get a knockdown with it unless she has 25% meter. For its uses though, Lust Shaker is actually frame advantage on block, so she can use this as a blockstring ender sometimes. Also, it allows her an alternate way to get a combo off a poke or 6k in corner without using S Tandem. The move is also cancellable into Iron Savior and Roll, which has limited uses.
214s->214d

Forcebreak Longinus, this move can only be done as a followup to Lust Shaker. It causes a knockdown and makes the opponent go into a sliding state. Not very useful midscreen because it causes a sliding knockdown that makes the opponent go to the other side of the screen, so she doesn’t have enough time to get any sort of okizeme. However, in the corner it’s great, as she is then close enough to run up after Longinus and relaunch the opponent into an air combo into knockdown. This move is also frame advantage on block, but there is no reason to ever use this in pressure since Lust Shaker is also frame advantage on block.
214h
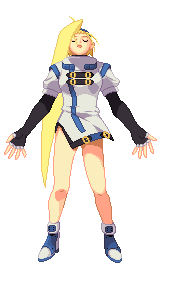
Secret Garden, this move is a big part of her mixup game, though not quite as big as H Tandem Top and FB Pretty Maze. The main reason for this is because it’s mainly useful after corner knockdowns, not midscreen ones, as the opponent can just get away for free midscreen. When activating the move, it accepts up to 5 inputs(done by inputting a direction + h) in a 53 frame window to control the movement of the sphere. There are many different useful variations for the sphere movement, which will be covered in more depth in the okizeme section. The move can also be cancelled early on by pressing D, which I guess is good if you accidentally activated the move and want to cancel it. This move is also good to throw out after an airthrow against certain characters, as once the sphere comes out, nothing is going to stop it.
j.236p
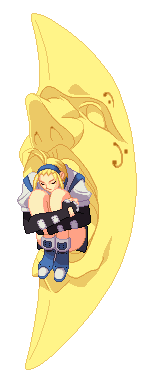
Bad Moon, this is Millia’s most important overhead option, as when this is tiger kneed perfectly it’s a 16 frame overhead. The overhead floats too, so if it hits it knocks down and allows Millia to reset into another mixup. However, it is not safe on block. At -15f, most characters can counterattack with something if they correctly block it, so Millia is taking a risk whenever she goes for this. However, it is safe on block if it is done when she has an H Tandem Top, FB Pretty Maze, or Secret Garden set up. They will provide extra blockstun after she recovers from the Bad Moon, allowing her to run back in and continue pressure or have another mixup opportunity. She also has an FRC point on Bad Moon, which has limited usefulness, but it does make the move safe on block I guess. The other use for this move is in combos, as ending an air combo in Bad Moon(generally after a low air dust) can help in achieving a knockdown.
j.236k
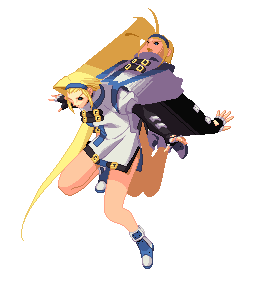
Turbo Fall, this move has two main uses: in mixup and in movement. First off, she can get a crossup mixup when doing her H Tandem Top or FB Pretty maze setups by doing a tigerknee Turbo Fall when close to the opponent. It’s a bit harder to react to than her roll crossup. The other use for this is in manipulating her movement. It’s very useful to use this move to land on the ground from high up in the air, like after an airtech. Combined with her double air dash, her general movement speed, and her pins, the turbofall makes it really hard for the opponent to intercept Millia’s landing.
j.214s
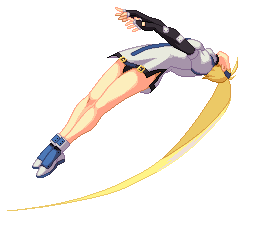
The S version of Silent Force, this move is essential to Millia’s neutral game and is probably the best projectile in the game as well. First off, it comes out really fast at 11 frames of startup, and it travels extremely quickly at a 45 degree angle downward. It recovers relatively quickly too. On a ground counterhit, it staggers the opponent, allowing Millia ample time to land and combo them, and on an air counterhit, it’s untechable for 28 frames, which is usually enough to give an untechable knockdown. Most of the time Millia will be able to land quickly enough to combo off of that too.
Since Millia doesn’t have any strong jumpins of the same caliber of stuff like Slayer j.h or Chipp j.d, she needs the pin to make opponents wary of trying to antiair her all the time. Since she also recovers really fast off of the move, it’s an excellent way for her to get in on the opponent. After making the opponent block the pin in the air while she’s low to the ground, she can then choose to land and pressure them or airdash into an air string and go for more pressure. She can also just go directly into a j.p or j.k after recovering from a low air pin, or even a j.s if she’s a bit higher. The pin also manipulates her air momentum, making her stay in the air a bit longer. The other use for this move is in combos, as doing j.d or j.h into pin and then land 6h is a very common combo ender. Normally, she needs to land a very low air j.d to get a knockdown in her air combos, but pin allows her to get a knockdown at a much greater range of heights and distances in the air.
j.214h

The H version of Silent Force, the main difference between the H and S versions is that this version makes her fly up in the air before the pin comes out, effectively making the startup a bit longer. The idea of using the H version is the same as the S version, but H Silent Force is still a bit more limited. It doesn’t really have any use in combos, though. It can be very useful against opponents that like to avoid the S pin by going over it.
236236s

Emerald Rain overdrive, this is a really important super to her as it increases her effective range, allowing her to combo into a knockdown from her pokes and overhead at much better distances than normal. It also does pretty good damage. This is not a super to throw out randomly; it should be used in combos only. The super does have a problem midscreen though, as depending on distance the 2nd and 3rd discs that are fired out either will miss or will hit OTG. But just as long as the 1st disc hits, a knockdown is usually guaranteed, which is the most important part.
2141236h
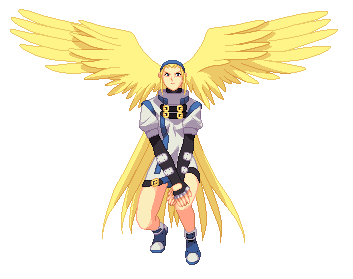
Winger overdrive, this is basically Millia’s reversal super. The first 7 frames are invincible, and it starts hitting at frame 6. Winger does pretty good damage, and in many cases she can combo off of it. Followup combos generally do big damage too. Despite this, Winger is one of the worst reversals in the game. It is completely unsafe on block, has the really obvious superflash to give it away, and many other uppercut type moves that other characters can use have better invincibility and don’t cost meter. She does have an FRC point on frame 23-24 of this move, but having to spend 75% tension just to get a safe reversal on a mediocre super doesn’t really seem worth it to me.
Instant Kill
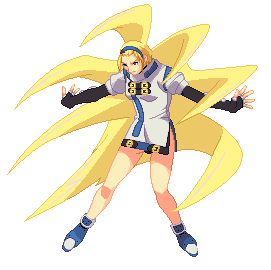
Millia’s instant kill Iron Maiden, obviously you shouldn’t be using this(much) in any serious matches, but here’s some info on it. She actually has one of the better instant kills in the game, as she doesn’t have to be close to the opponent to hit with it. The hair pillars home in on the opponent’s location so she can hit them with the instant kill from anywhere. Her Instant Kill is mainly good against ABA, as if she scores 3 knockdowns against A.B.A in Moroha mode, she can easily go into IK mode and use this move. It will hit A.B.A from anywhere, so she doesn’t have to run in close to hit her with it. This is good because even when A.B.A is knocked down 3 times, she can still burst if she has it available.